A conversational voice bot using IBM Voice Gateway

This tutorial aims to configure a voice bot using IBM Voice Gateway. This will allow us to call and have a conversation with a bot, in the background, IBM Voice Gateway will use a Speech To Text service to convert the user’s audio into text, process this text using Watson Assistant, and play the response back to the user using a Text To Speech service.
This approach provides a lot of flexibility in terms of how the conversation is handled. Furthermore, IBM Voice Gateway abstracts the integration with Speech To Text, Text To Speech, and the Dialog Management, which allows for custom integrations with any vendor of your choosing.
Note: You can set up a deployed version of IBM Voice Gateway as a paid integration for Watson Assistant. Alternatively, using the steps mentioned in this tutorial, you can deploy the stack by yourself.
IBM Voice Gateway
Voice Gateway orchestrates Watson services and integrates them with a public or private telephone network by using the Session Initiation Protocol (SIP).
It’s a set of two microservices, shared as docker images. The first is called Sip Orchestrator. It handles the Sip Communication and further acts as the orchestrator for Watson Assistant and the second service; Media Relay. The Media Relay focuses on processing media, handling RTP audio, and communicating with the Speech To Text & Text To Speech services for transcribing/synthesizing speech.
You can find out more about IBM Voice Gateway here.
Prerequisites
Setup
Before we get to configuring the voice bot, we need to generate a set of keys for the services we will be using as part of this tutorial. If you already have these, you can skip this section.
Watson Speech To Text
In order for the bot to have a conversation, it needs to understand what the user is saying. To do this, a speech to text service is used to convert the user’s speech into text.
If you want to use a different vendor such as Google, Microsoft, or Amazon, you can do that by using a custom speech to text adaptor.
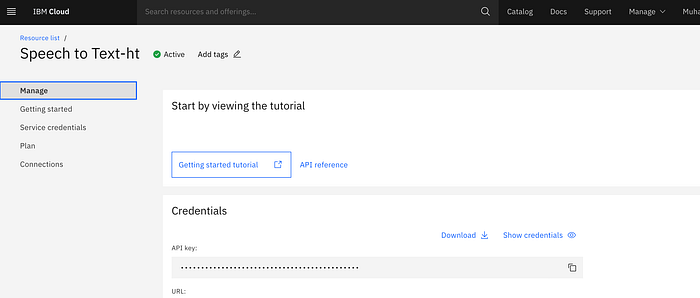
Steps to get the STT credentials
- Access the IBM console and find the Speech To Text resource
- Click on create
- You will be redirected to the resource page once the creation is complete
- Click on Download to get the service credentials
Watson Assistant
The converted text is passed to Watson Assistant, at which point the conversation can be carried out by configuring a set of intents and entities and the associated response for each.
To extend this functionality, a service orchestration engine (SOE) can be used which can act as a proxy between Watson and IBM Voice Gateway. This can also act as an alternative to Watson Assistant, wherein; for example, you could use Google DialogFlow or Luis for the conversation or simply for identifying the intents and entities and handling the responses within the SOE service.
Steps to get the Watson Assistant credentials
- Access the IBM console and find the Watson Assistant resource
- Click on create
- You will be redirected to the resource page once the creation is complete
- Click on Download to get the service credentials
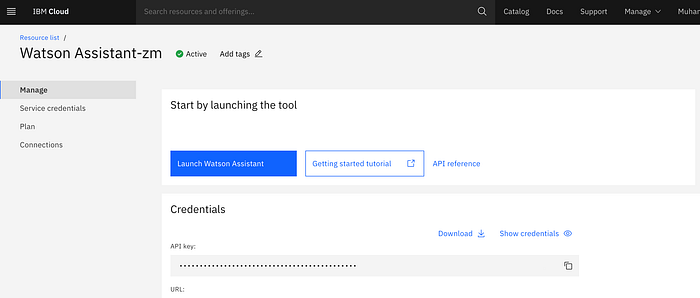
- Click on launch Watson Assistant
- Click on the three dots on the right and click on settings

- Select API Details and take note of the Assistant ID as you will need this later
Configuring The Dialog (Optional)
You can extend the Watson Assistant by adding additional intents & entities and using them inside the Dialog nodes. As part of this tutorial, we will be using a pre-built skill found in this repository. It has a lot of good examples so do check it out if you have the time.
- You can find the Skill here, copy the contents of the file and save them inside a file on your local machine.
- Head to Watson Assistant and access your skill.
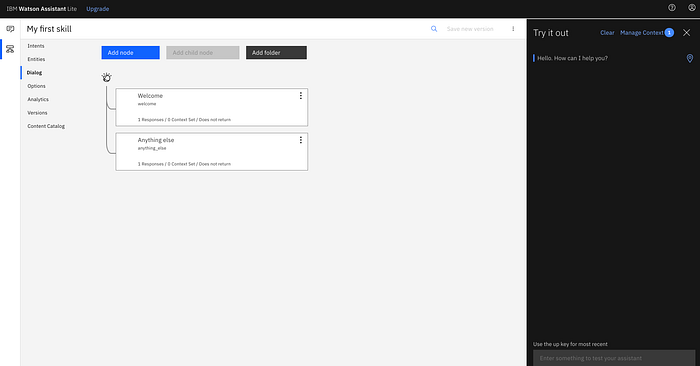
- Then open the options and click on import
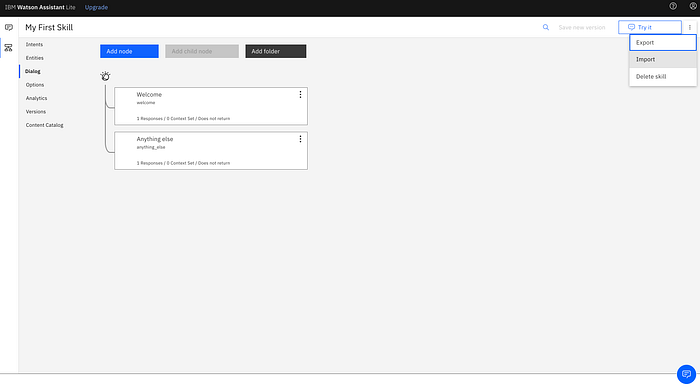
- Select Import and Overwrite, and select the conversation file you saved in the first step. This should set up the Watson Assistant.
Watson Text To Speech
Finally, once we have a response from Watson Assistant, we need to play it back to the user. This is where the Text To Speech service comes in. It will take a text message and generate the audio using a speaker of your choice. This will be played back to the user.
If you want to use a different vendor such as Google, Microsoft, or Amazon, you can do that by using a custom text to speech adaptor.
Steps to get the TTS credentials
- Access the IBM console and find the Text To Speech resource
- Click on create
- You will be redirected to the resource page once the creation is complete
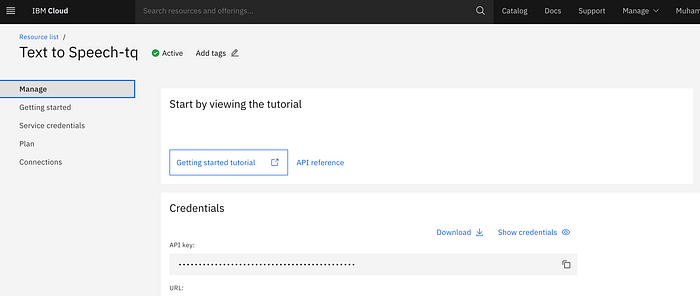
- Click on Download to get the service credentials
Combining the config files
The last part of the setup is to combine all the configurations we have collected until this step.
Create a folder and inside it, create a file called “.env”. Copy the template below into this file.
.env should contain all the secrets for running IBM Voice Gateway using docker-compose.
You should already have all the required configuration except the IP address. Fill those out first.
You can find your IP address using the system preferences and selecting the Network settings if you’re on a mac or using the “ipconfig” command if you’re on windows.
One additional thing that needs to be done is to the ASSISTANT_URL for Watson Assistant. We only want the base URL, it should look something like the following “https://api.eu-gb.speech-to-text.watson.cloud.ibm.com”.
Note: The “/instances/instance-id” has been removed from the ASSISTANT_URL.
Adding the docker-compose file
The next step is to add a docker-compose file in the same folder. Name it “docker-compose.yml” and copy the contents from the below file inside it.
When you start the services using docker-compose, it automatically looks for a .env file in the same location and loads the configuration. All keys wrapped in “${}” will be replaced with the secrets from the .env file at runtime.
The two services i.e. Sip Orchestrator and Media Relay. With this, your IBM Voice Gateway stack will be running locally.
Testing
The final step of this tutorial is to be able to make test calls and have a conversation with the voice bot. As IBM Voice Gateway uses the SIP protocol for handling voice conversations, we need to use a sip client such as Linphone.
Note: If you’re planning to deploy this stack on a public server and call using your phone, you will have to buy a phone number from Twilio and link a SIP Trunk which will act as the SIP client.
For this tutorial, we will configure Linphone, so please ensure you have it installed before moving on to the next steps.
Steps to setup Linphone
- Open preferences and select the Network Tab
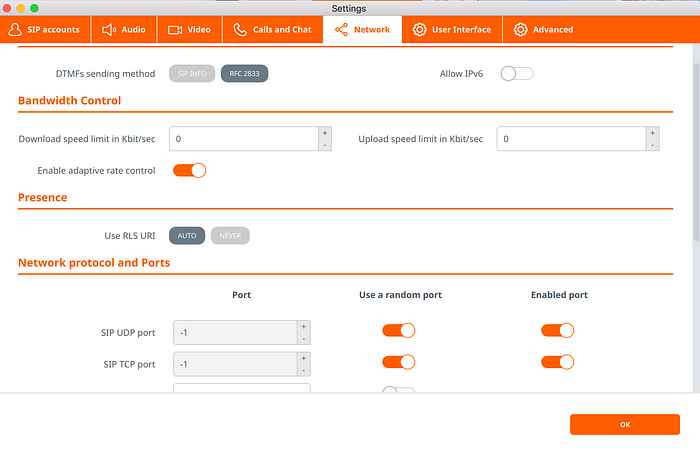
- Disable the “Allow IPv6” toggle
- Enable the “Use a random port” for SIP UDP port and SIP TCP port (This is done to avoid a port clash since IBM Voice Gateway also runs on port 5060)
- Click OK to save the configurations
Steps to make a call
In order to make the call, we need to know the destination address. As the call is made over SIP protocol, we need a destination SIP URI. A SIP URI will have the following format.
SIP-URI = sip:x@y:Port where x=Username and y=host (domain or IP)
The username is for the entity you’re calling. Normally, when integrating with a provider like Twilio, the username will be the dialed phone number.
To create the SIP URI for yourself, replace the “[IP_ADDRESS]” in the following URI with your IP address.
“sip:voice-gateway@[IP_ADDRESS]:5060”
The SIP URI I am using looks like the below.
“sip:voice-gateway@192.168.0.13:5060”
- Make a note of the URI and inside Linphone, paste it in the search bar
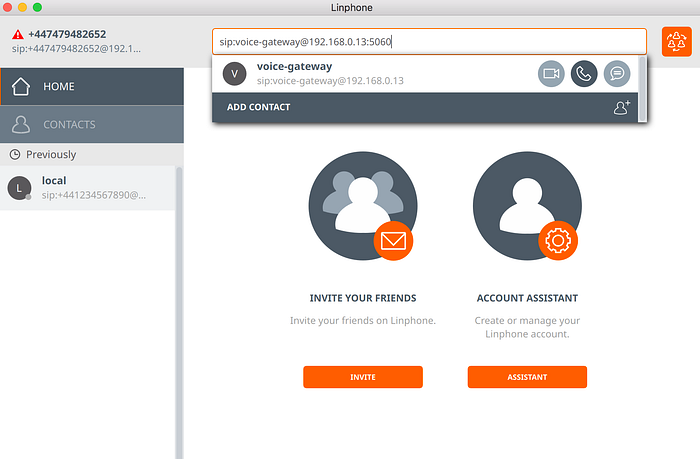
- Click on the call button
- You should see the below screen and the call should connect
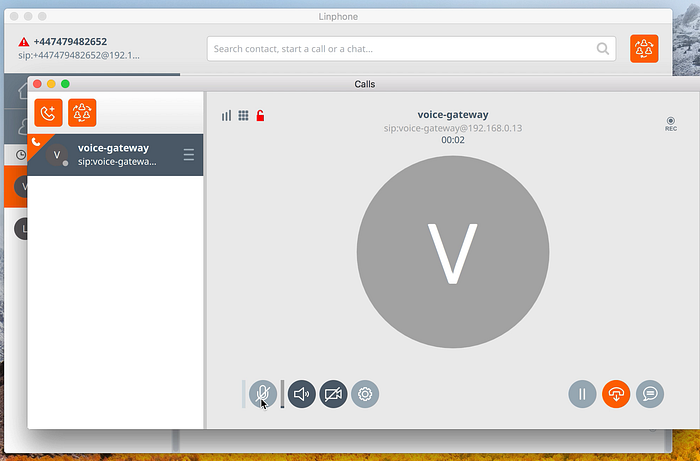
With this, you should now be able to call the voice bot and have a conversation.
What’s Next?
Some ideas for what to explore next.
- Adding a Service Orchestration Engine between Watson and IBM Voice Gateway to provide custom responses.
- Deploying the stack on EC2 and linking it with Twilio.
- Extending the sample Speech To Text Adaptor to work with Google/Nuance

